Server:
IP ADDRESS 192.168.30.1
NETMSK 255.255.255.0 (/24)
GATEWAY 192.168.30.254
Client:
IP ADDRESS 192.168.30.10
NETMASK 255.255.255.0 (/24)
GATEWAY 192.168.30.254
DNS 192.168.30.1
- Siapkan PC yang sudah terinstall system operasi Debian Woody
- Pastikan DNS Server sudah siap digunakan
- Setting file resolv.conf
# nano /etc/resolv.conf
search zulmi.net
nameserver 192.168.30.1
- install paket postfix,uw-imapd,ipopd,squirrelmail
# apt-get install postfix
- konfigurasi postfix


- buat 2 user untuk tes mail
# useradd –m admin
# useradd –m tkj
- tes postfix dengan telnet melalui port 25
# telnet main.zulmi.net 25
Trying 192.168.30.1...
Connected to server.zulmi.net.
Escape character is '^]'.
220 server.zulmi.net ESMTP Postfix (Debian/GNU)
mail from: admin
250 Ok
rcpt to: tkj
250 Ok
data
354 End data with
percobaan
.
250 Ok: queued as 05D021B4A6
quit
221 Bye
Connection closed by foreign host.
- tes imap dan pop3 dengan telnet melalui port 110
# telnet main.zulmi.net 110
Trying 192.168.30.1...
Connected to server.zulmi.net.
Escape character is '^]'.
+OK POP3 server.zulmi.net v2001.78 server ready
user tkj
+OK User name accepted, password please
pass tkj
+OK Mailbox open, 1 messages
list
+OK Mailbox scan listing follows
1 416
.
retr 1
+OK 416 octets
Return-Path:
Delivered-To: tkj@zulmi.net
Received: from server.zulmi.net (server.zulmi.net [192.168.30.1])
by server.zulmi.net (Postfix) with SMTP id 05D021B4A6
for
Message-Id: <20101128111951.05d021b4a6@server.zulmi.net>
Date: Sun, 28 Nov 2010 11:19:51 +0000 (GMT)
From: admin@zulmi.net
To: undisclosed-recipients:;
Status:
percobaan
.
quit
+OK Sayonara
Connection closed by foreign host.
- edit konfigurasi squirrelmail
# nano /etc/squirrelmail/config.php
$org_name = ‘squirrelmail’;
$domain = ‘zulmi.net’;
$imapServerAddress = ‘zulmi.net’;
$smtpServerAddress = ‘zulmi.net’;
- konfigurasi httpd.conf
# nano /etc/apache/httpd.conf
NameVirtualHost 192.168.30.1
DocumentRoot /usr/share/squirrelmail
ServerName mail.zulmi.net
- restart httpd
# /etc/init.d/apache restart
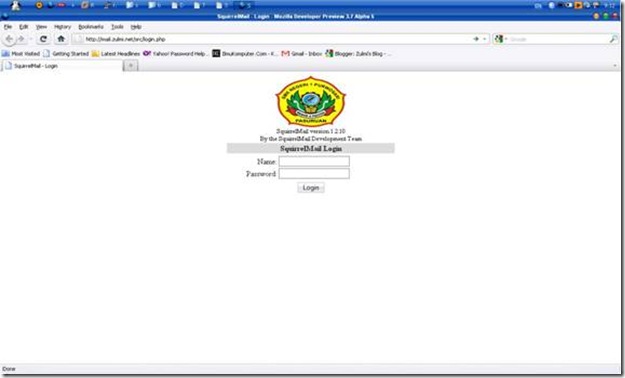
- tes pada browser client

- jika muncul tampilan login squirrelmail maka mail server sudah siap digunakan,untuk logo bisa di ubah pada saat konfigurasi file config.php pada squirrelmail